Showing posts with label acres land trust. Show all posts

Wednesday, July 17, 2013

"Winter" in Stained Glass


      Over a year ago I embarked on a journey that would take me on many nature hikes during every season. The visual images that filled my camera have become the inspiring fuel powering my culminating project for the 2012 Lilly Teacher Creativity Fellowship Program. I have been designing and creating 4 large stained glass panels, each depicting one of the four seasons. My last blog post detailed how I created an homage to springtime using the copper foil method.
Tree of Life window by Frank Lloyd Wright
DarwinMartin House, 1904, Buffalo, New York
      When I had finally completed "Spring," it was time to move on to the next panel.  Logically, Summer would have been next, right?  Not so if you are the proud owner an ADD brain like mine. I was beating my head against the proverbial wall attempting to force onto paper something resembling a summery design. So I procrastinated - my preferred coping mechanism.  In the meantime, my family had taken a trip to Chicago (read about that here and here) where we visited the Art Institute. While there I stumbled upon some leaded glass windows by several Craftsman style artists including Frank Lloyd Wright, one of my favorites. From then on, I was determined to create at least one of my panels using characteristics of the Craftsman, or Prairie, style...strong geometric lines and shapes, earthy and neutral colors, lots of symmetrical patterns.
It didn't take long for me to abandon realistic designs (that weren't flowing very freely anyway)
 for a more geometric interpretation of nature.  
            Since I was failing miserably at coming up with a great realistic interpretation of something summery, I decided to abandon that approach and try a complete reversal...a new season, and a new style. It was kismet. I had recently taken a winter hike just down the road at a nearby nature preserve, and had some fresh photos on my camera. (Yes, I procrastinated right through Autumn!) I got lucky; I took only one winter hike and from that hike had the photos I needed to formulate a design plan for "Winter!"  
This picture contains the color palette that I would use in my "Winter" panel:
white, grayish, light amber, and dark amber.
      The winter landscape lends itself nicely to a Craftsman style interpretation in many ways.  The colors of an Indiana winter are very neutral with lots of white, grays, and various shades of amber or brown.  The absence of most foliage and undergrowth allows the geometric lines and patterns of the tree branches, fallen logs, and naked plants to become the main scenic focus.  
I liked how these dead, snow covered leaves took on a diamond appearance, and decided to use the diamond shape in a pattern in my panel - amber on the bottom, white on top.
The strong diagonal angles in this photo would be almost completely hidden from view on a summer's day.  The angular elements of this photo inspired the structure of my "Winter" panel.

            After perusing my collection of wintery photos and determining how I would use them in my design, I came to the conclusion that this would be a good time to part ways with the copper foil method of making stained glass.
The challenge in constructing a stained glass design in this way is that all the pieces are somewhat mobile until the solder is added last.  You can see that I've used horseshoe nails to hold everything steady until then.

       Luckily, I had recently completed a class at GlassLink in Fort Wayne where I learned (or rather, re-learned) how to create a stained glass panel using the leaded glass technique.  You can read a detailed description of this method here and here. Rather than using adhesive copper foil tape on each glass piece, I would be using lead came to interlock all the glass pieces together, then solder them in place.
"Winter's" design is taking shape.

       One of several advantages of the leaded glass method is that there is very little need to grind each piece of glass after it's cut, since the edges will be hidden inside the lead channels. With no grinding and no foiling, this panel went together rather quickly. After all the pieces are locked in place with the lead came, it's time to solder.
The only soldering needed is at the joints. 
Where each section of lead came comes together, a blob of solder is added to cover the gaps and create a permanent connection.

      Another advantage is the soldering routine.  When surrounding each piece of glass with lead came, it eliminates the need to add more lead solder as in the copper foiling method. Therefore, the only soldering necessary is at the joints.  A panel this large done in the copper foil method would take at least a couple of hours to solder just one side.  Using this method, I was done with both sides in just under 30 minutes!
The magical chemical that changes all silver to black with just the swipe of a paintbrush!

      Only one step left before framing: patina!  Lead in it's natural state is generally silver. The stained glass artist has a choice of leaving it silver or chemically altering it to look black.  Most of the time the artist makes this choice based on how it will effect the overall look of the design.  I decided my lead needed to be black.  
So easy...brush it on - instant black! 
I've learned to avoid too much skin contact, as it will turn your  hands black, too.  And not in a patina kind of way, in a chemical burn kind of way!

      After a quick wash, and some help from my Frame-Guy (dear old Dad), I have successfully completed panel #2, "Winter!"  So very different from the "Spring" panel, but a tremendous learning experience!

I love how this Craftsman style panel interprets winter imagery in a geometric, abstract way.

This multiple personality panel looks very different when viewed in different environments and lighting.  This is a view with the light source from the backside. 

There are areas of a special iridized glass in this panel. I think the trickiest part of the entire project was getting photos to show the iridescent shimmer!   

TWO down, two to go! 
Stay tuned to see what seasonal glass creation I came up with next.

Monday, July 1, 2013

"Spring" in Stained Glass

      In the past year and a half I've taken over 28 hikes at nearby and not-so-nearby nature preserves. I've taken over 36 hours of technical stained glass classes. And my family and I have visited museums and galleries seeking out glass art in 3 states.  The time has come...
Let's get this party started!
The "Spring" panel contains 4 smaller stained glass designs, each containing springtime flowers.  This panel with the Giant Swallowtail butterfly will become the focal piece of this panel. I draw each design, then photograph it to create a small "coloring book" style sheet.  This way I can experiment with my color choices before I buy the glass.
...to begin putting all this inspiration to use!  As my culminating project for the 2012 Lilly Teacher Creativity Fellowship Program, I have been designing and creating 4 large stained glass panels, each depicting one of the four seasons.  
This design features the Prairie Rose, a very common wildflower in Indiana.
Each design in my panel is an original interpretation of a photograph, sometimes a few photos, drawn by hand and outlined in Sharpie.  Outlining with Sharpie is important because it effects the size of each glass piece later.   
     My designs have been inspired by Indiana's natural splendor experienced during my hikes and have relied heavily on photos that I have taken, several of which have ended up on this blog.  I have used different glass methods and construction techniques that I've picked up during my year and a half of stained glass classes, and have even experimented with different styles of art as a result of being able to see famous stained glass works by some of my favorite glass artists during museum visits.
The smallest design within the Spring panel features a White Trillium.  
      I decided to begin my stained glass panel making journey with the "Spring" panel because, logically, I began hiking in the springtime and had many photos ready to inspire my designs. Coming up with the designs for the 4 smaller designs within Spring was easy and quick.  (Little did I know that this would be the ONLY panel for which design ideas would come "easy and quick"!)
The final design within the Spring composition features these very recognizable Tiger Lilies, or Ditch Lilies as they are sometimes called due to their prevalence in the ditches of many Indiana roadsides.  The design for this section came easily enough, but I had a couple go-arounds with the color pattern of the flowers.  Interpreting a color-fade using glass can be tricky.
      Once the designs were laid out, I was off and running.  I constructed the Spring panel using the copper foil technique that I've used for the past 15 years. (At this point I had not yet taken the leaded glass class where I re-learned how to use lead came instead of copper foil.) 
After the design is created, each piece of the pattern gets numbered, then cut apart.
Earlier I stated that tracing with Sharpie is important for the pattern's size.  When each piece gets cut apart, the marker line must be removed, too.  The thickness of the marker line translates to the thickness of the future copper foil.  If I didn't use the marker line to allow for the copper foil, my design would "grow" out of its pattern and become mighty confusing!
All those marker lines removed, whew! What a tedious job.  
It's a good thing I enjoy cutting "on the line" and even find it somewhat therapeutic.
I'm weird like that.  
      I first had to cut my pattern pieces, then trace them onto the glass and cut the glass to fit. As with any form of art, there are sometimes instances when the design must change a little from the original plan. In a couple of my Spring designs I had to occasionally make two or more tiny glass pieces into a larger single piece simply because tiny glass pieces will disappear under the copper foiling and solder later.  
The piece of yellow glass labeled "33 34 43" (in the center) was originally supposed to be three separate pieces.  Call it economy or laziness...those 3 became 1!  

Later, I added wire where the separations should have been to maintain the original design.
      When all the pieces were cut, next comes the grinding.  Grinding is like sanding the glass edges smooth (for a good adhesion when applying the copper foil tape later), and at the same time perfecting the piece's shape. I have a special glass grinder that I use for this.  (It also works nicely for filing your nails in a hurry!)  
You can see that my pieces do not fit together very well after rough-cutting using pattern pieces.  
Everything lays flat and fits into the pattern after grinding.
      On this particular section, the Tiger Lilies, I discovered that a couple of my glass pieces were really not the right shape.  Sometimes with the copper-foiling method large gaps of space can be filled in with lead during the soldering process. However, on this piece the gaps where either too large, the fill would alter the overall look I was going for, or the pieces were just altogether wrong.  So...
Pieces 38, 30, and 25 had to be completely remade.
The challenge: all the other pieces are already solder-tacked in place and nothing can be moved.  
...I had to figure out how to re-do several pieces with everything else already in position.  It was a crapshoot, but I got the job done!
I positioned a scrap of paper over the 38 space.  I then did my best to trace the exact shape. Since the paper wasn't see-through enough to just trace it, I rubbed around the edge with my finger just enough to depress the paper into the space and create a line for me to trace with pencil.  
Once I had my new pattern piece, I transferred it, cut it, and ground it as usual.  A perfect fit!  
      When all the cutting and grinding is done, next comes the foiling process. Copper foil comes on a large roll and is adhesive backed. Each individual piece of glass is wrapped with the foil and positioned onto the pattern.  You can see a more detailed description of the copper foiling method here. 
The gold areas are the copper foil wrapping the edges of the glass pieces.  
      On the butterfly piece, I decided to do a foiling experiment.  The design of the butterfly's wings was so intricate, I knew I would send myself to an early grave if I tried to interpret it strictly with glass. So I decided that the black lines in the butterflies wings would be patina'd solder rather than black glass. This meant that my foil lines would need to be wider in some areas than the usual small strip. In the photo above you can see where I added extra copper, and in some areas I cut the copper to form specific shapes or curves.  
      
Tacking all the loose pieces together with solder to prevent shifting.
      Once everything is foiled and positioned, it's time to solder. The first step is to tack all the pieces together using a little blob of molten lead.  This holds everything steady when the precision soldering takes place. Because the solder hardens instantly and is almost impossible to remove, shifting during soldering would create a disaster worthy of a Titanic-sized nervous breakdown!  
After the precision soldering.
      After the tacking comes the precision soldering. The goal is to get the lines smooth, slightly rounded, even, and perfect.  It's tedious work requiring a steady hand and an affinity for the smell of burning flux.  And just when you think you are all done...you remember you have to flip it over and do the entire back side.
Remember the special foiling experiment I did to replicate the butterfly's design?  This photo shows how the solder spreads out and covers the foil, no matter what shape it's in.  

      After many designs, cutting, grinding and foiling hundreds of pieces of glass, and sucking in more than my fair share of solder fumes, all four of the Spring sections are done!  Now, I must join them all together into one grand panel.  
There they are: Giant Swallowtail, Prairie Rose, White Trillium, and Tiger Lilies. 
      I decided to add a small border of clear textured glass around the perimeter and between each section to complete the composition. There's nothing quite like seeing a large project come together in the end!  
      
Dad clamping Spring's frame in place.

      At this point there's only one step left...framing!  I had a good mentor for this step, my dad.  Dad made the frames for all my panels, and between the two of us we got them stained, varnished, and constructed around the glass. With the frame in place the finished product exceeds my wildest expectations!! I am completely thrilled with how this glass creation has turned out.  I've never made something so meticulous, so detailed, so intricate, or as BIG as this.  It's one of those accomplishments that really makes you feel like you can do anything!    
"Spring"
Completely finished!  One step I didn't get photos of was the application of the patina.  All the soldered lines that were once silver are turned black when I brush on a chemical to artificially patina the surface.  The atmosphere and time would eventually do the same, but who has 50 years to wait for lovely black solder lines?

This Giant Swallowtail, photographed at Dygert Nature Preserve in Whitley County, was good inspiration!
Detail of Giant Swallowtail.
Antenna and legs were added by attaching shaped copper wires.
 

Cypress Meadow Nature Preserve in Allen County was were I found the Prairie Roses that served as my unwitting models.
Detail of Prairie Rose.
The yellow center was layered atop the pink flower, and the bumpy texture around the flower's center was created using a technique I learned in my creative soldering class.
The yellow in this flower is another example of altering the original plan.
The four yellow pieces you see are actually one single piece with wire attached on top for the illusion.  Those pieces would have just been too tiny!
This White Trillium was photographed at Bock Nature Preserve in Kosciusko County. 

Tiger Lily inspiration courtesy of the Tom and Jane Dustin Nature Preserve in Allen County.
      ONE down, three to go! 
Stay tuned to see what seasonal glass creation I came up with next.

Friday, February 15, 2013

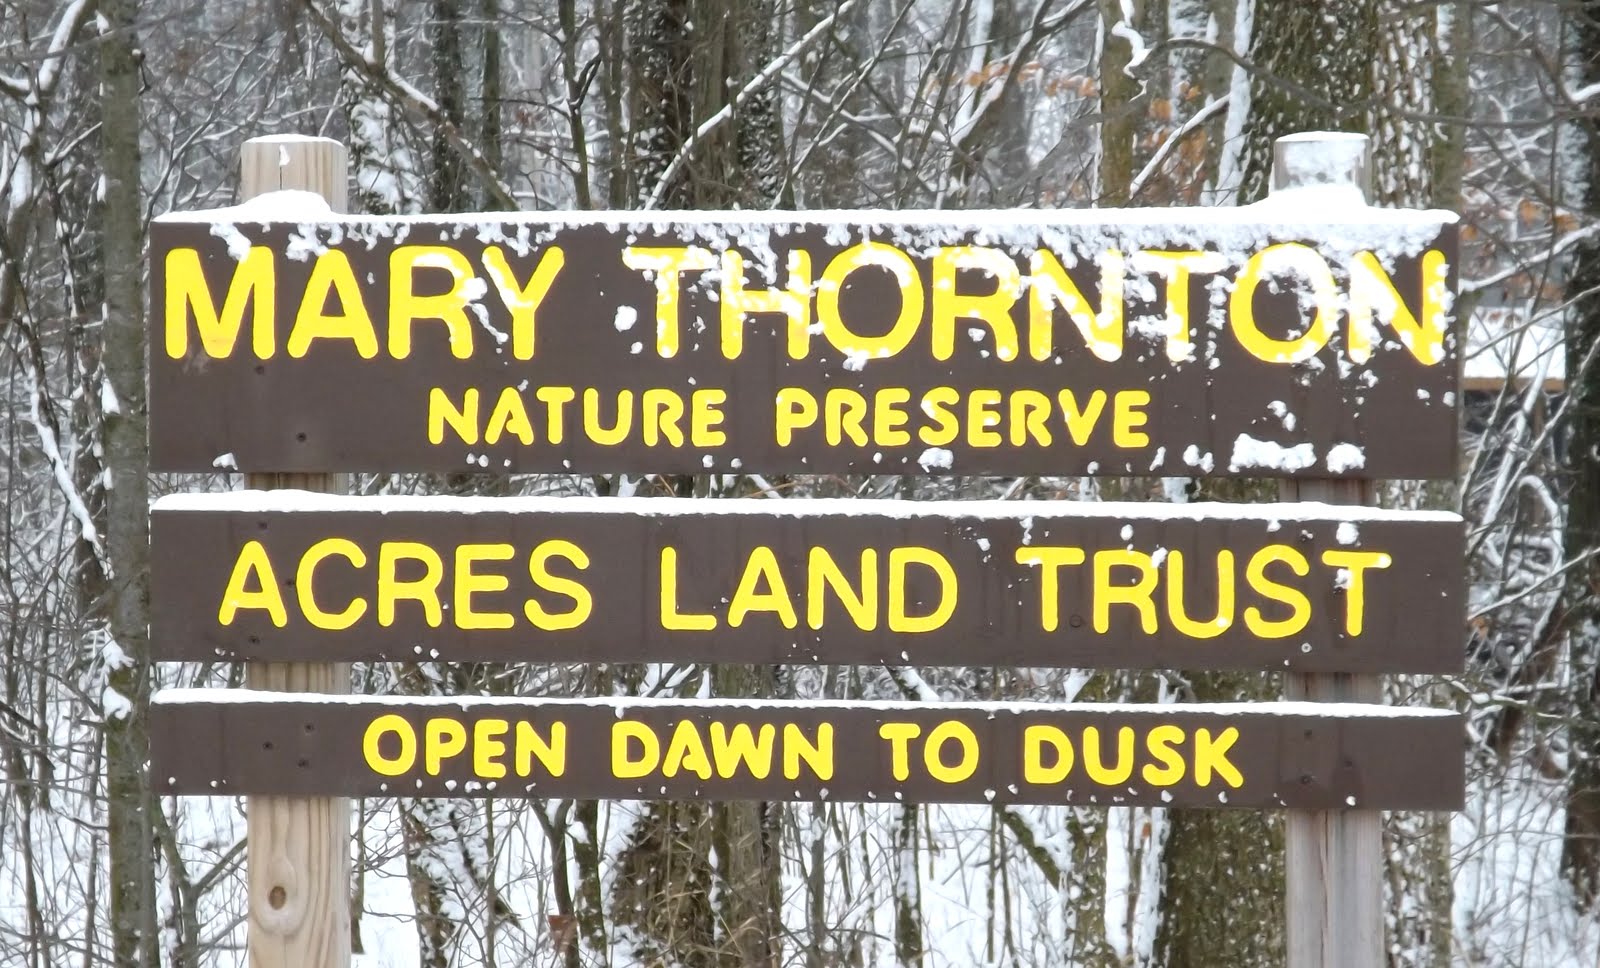
Mary Thornton Nature Preserve, Wabash County

Walking in a wintery wonderland at...
Mary Thornton Nature Preserve, Wabash County, Indiana
      The last couple of winters around here have produced little in the way of measurable snowfall, sadly.  I have become anxious about receiving visual inspiration for my Lilly Teacher Creativity Fellowship project's "Winter" stained glass panel. What's winter with no snow? Brown, that's what.
A snowy path through Mary Thornton's woods.
      Luckily, Mother Nature finally decided to bestow upon us some of the white stuff. Not enough to cancel school, (not even a delay!) but enough to provide me with a snowy photo op, and hopefully some wintery inspiration.
A perfect winter snow: soft, fluffy, and peaceful.
      My time spent outside during my Teacher Renewal Grant has taught me that I can learn to be more outdoorsy. In fact, I have come to crave being enveloped in the great outdoors - the colors, the air, the sounds and smells.  However, the preparations required for an outdoor adventure in the dead of winter is not a craving that I have yet acquired.
There's so much to do...long johns, socks, another pair of socks, heavy jeans (for those of us who own no coveralls or snowmobile suit)...
...long sleeved shirt, sweatshirt, hair pulled back, sock hat, hair taken down because a sock hat hurts with a pony tail, snow boots made one size too small from two pairs of socks...
...scarf, winter coat zipped up, winter coat unzipped due to aforementioned scarf caught in zipper, coat zipped again, gloves with removable finger covers for camera clicking, sunglasses for blinding snow...
...and finally, off to the woods!
      If I had to get in a car and drive to a nature preserve after all the effort of preparing for it, my "Winter" inspirations would probably be sourced from Google.  Lucky for me, the Mary Thornton Nature Preserve is a mere quarter mile walk from our front door.  Doable, even with my extra tight boots.  
Many fungi do not die in the winter. Several types of lichen and fungi are able to dehydrate their cells to prevent cellular freezing. They lie dormant until they are free from ice and suitable weather conditions have returned.
       Once inside the preserve, I was surrounded by a pristine, white blanket of snow.  Much of nature's details were hidden from view, but I was able to find several varieties of friendly fungus.  
Try as I might throughout the preserve, I was unable to find many colors.  I saw a lot of white (duh), brown, and oranges.  And this welcomed, be it tiny, bit of green moss.  
It can take years for bracket fungi, like this Turkey Tail variety, to break down and decompose a fallen tree.  The concentric lines you see on these fungi are growth rings, giving you an idea how long they've been working on this hunk of wood.
     This nature preserve is a small one, so I was finished with my picture-taking and snow-hiking before too long.  But the stillness of the frosty air and the gentle snowfall was so peaceful that I found myself lingering just a little longer within nature's wintertime splendor.  

Woods in Winter


~Henry Wadsworth Longfellow
When winter winds are piercing chill,
  And through the hawthorn blows the gale,
With solemn feet I tread the hill,
  That overbrows the lonely vale. 

O'er the bare upland, and away
  Through the long reach of desert woods,
The embracing sunbeams chastely play,
  And gladden these deep solitudes. 

Where, twisted round the barren oak,
  The summer vine in beauty clung,
And summer winds the stillness broke,
  The crystal icicle is hung. 

Where, from their frozen urns, mute springs
  Pour out the river's gradual tide,
Shrilly the skater's iron rings,
  And voices fill the woodland side. 

Alas! how changed from the fair scene,
  When birds sang out their mellow lay,
And winds were soft, and woods were green,
  And the song ceased not with the day! 

But still wild music is abroad,
  Pale, desert woods! within your crowd;
And gathering winds, in hoarse accord,
  Amid the vocal reeds pipe loud.
 
Chill airs and wintry winds! my ear
  Has grown familiar with your song;
I hear it in the opening year,
  I listen, and it cheers me long.